Over New Year's weekend, I made a few fun Christmas-themed subway art pillows with my friend, Jessica. (Actually, they were her belated Christmas presents that I made her help me make. And I made her buy her own Cricut, because they are too cool not to own. Because that's the kind of awesome friend I am.)
(And because she got a new camera for Christmas, also partially my fault, she took pictures so we could make this fun post for you!)
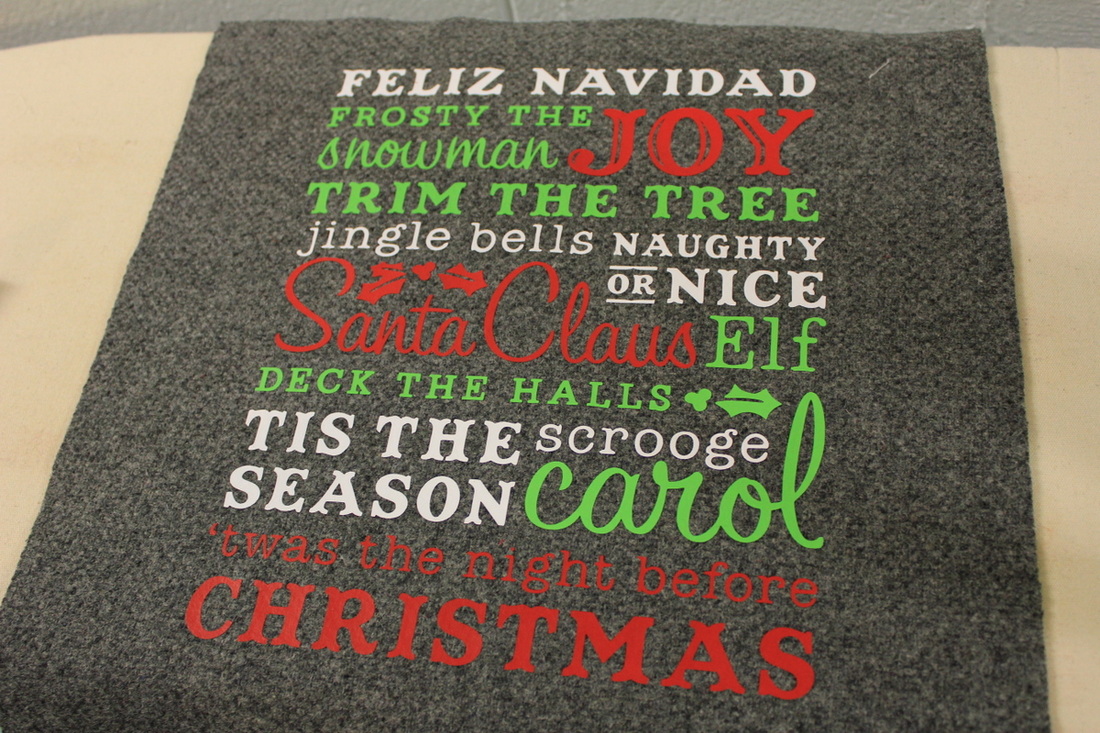
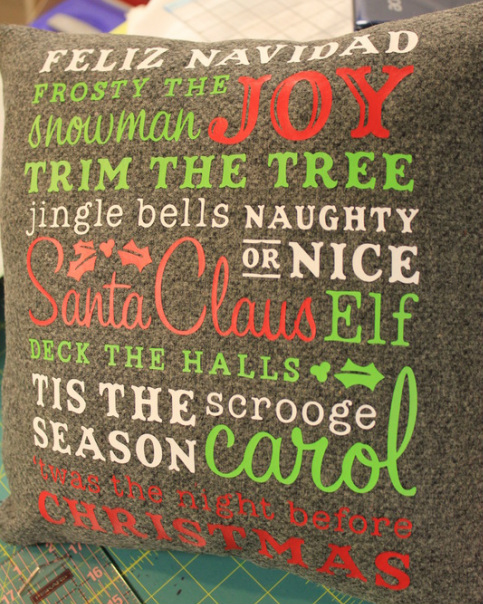
First, here is our finished pillow.
(And because she got a new camera for Christmas, also partially my fault, she took pictures so we could make this fun post for you!)
First, here is our finished pillow.
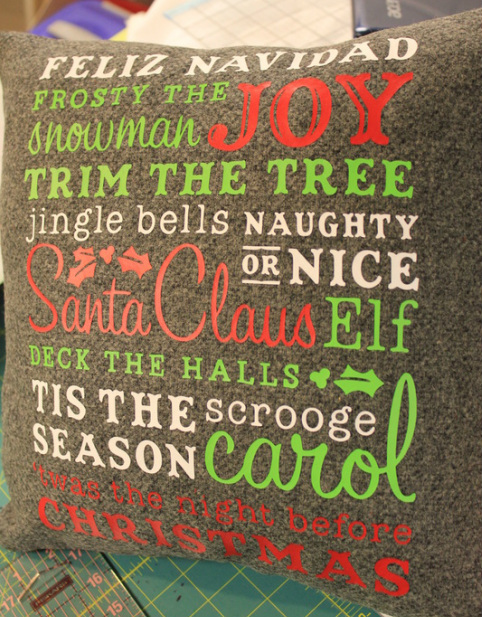
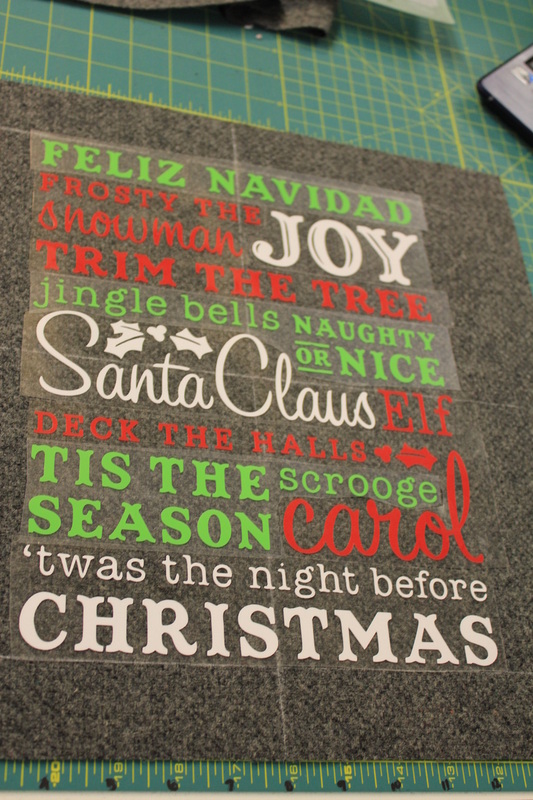
Christmas-themed subway art pillow made with Cricut's Word Collage cartridge
We totally got our inspiration (read: completely copied) from this post over at Obsessed with Scrapbooking.
I used some great vintage charcoal gray wool, and we used EasyWeed Heat Transfer Vinyl from Specialty Graphics Supply. I got the vinyl like a day after I ordered it from them, and as EasyWeed's name implies, it was very easy to weed and easy to work with!
So, on to how we did it!!
First, I ordered the vinyl in Apple Gree, Red, and White.
Then, we cut the complete image from Cricut's Word Collage cartridge, 3 times -- once in each color. (I sized it on my Gypsy to take up the full 12 inches of mat. I think it was around 9" wide.)
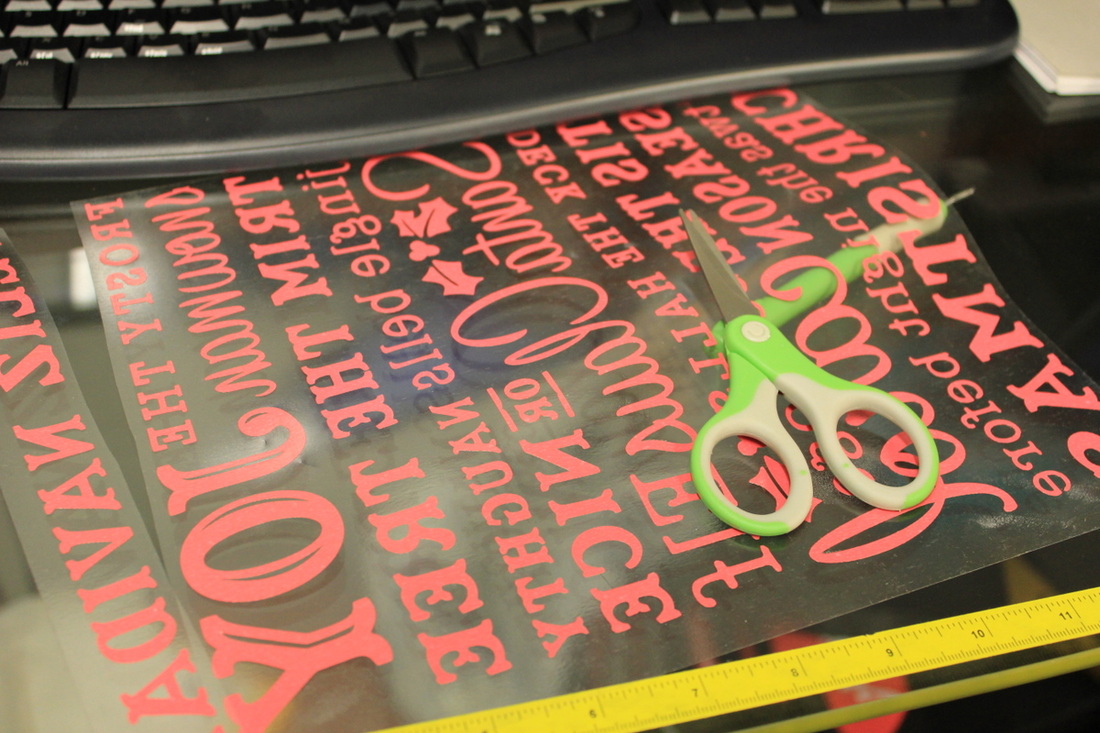
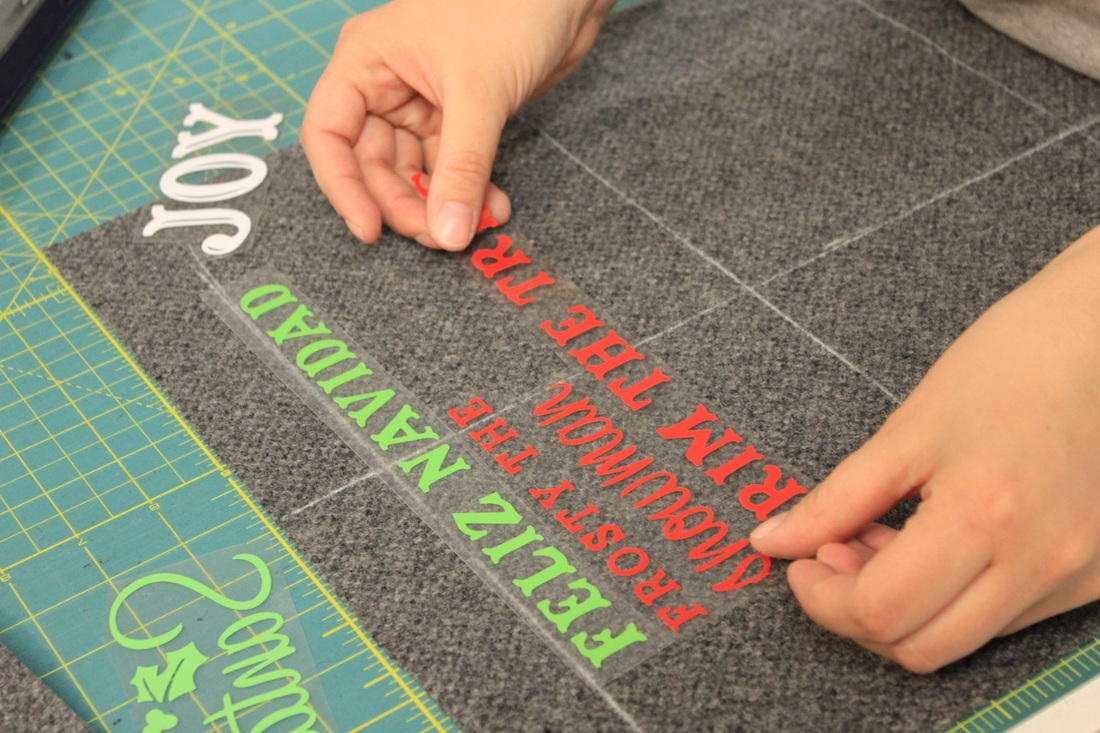
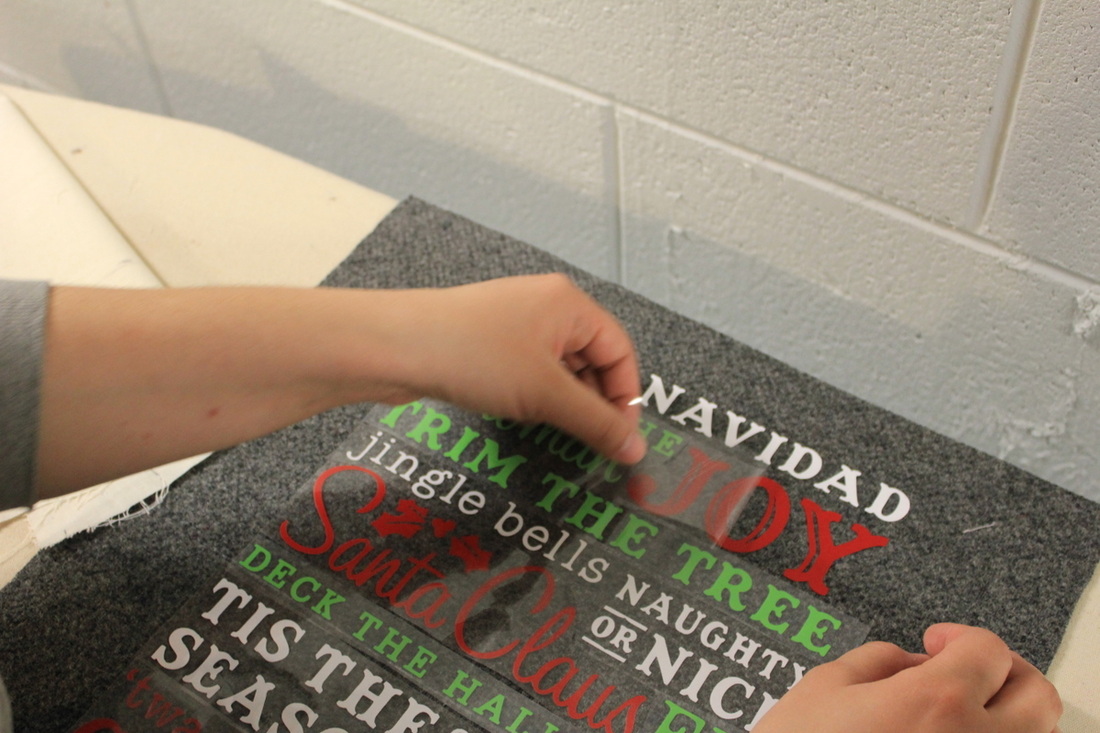
Remember to cut the image in reverse!! (So that it will show up the correct way when you iron it on to your fabric!) Then, we cut the words apart in each color -- the old fashioned way, with real scissors, not just the little scissors icon on your computer (or Gypsy!) We pretty much followed the way it was done at Obsessed with Scrapbooking.

So now, we were ready to start ironing it on to our fabric!
I decided to make 14" x 14" pillows, so I cut my fabric front at 15" x 15" to allow for 1/2" seams. I used my iron-off magic powder in my chacoliner to draw a few alignment marks so we could keep things straight.
I decided to make 14" x 14" pillows, so I cut my fabric front at 15" x 15" to allow for 1/2" seams. I used my iron-off magic powder in my chacoliner to draw a few alignment marks so we could keep things straight.
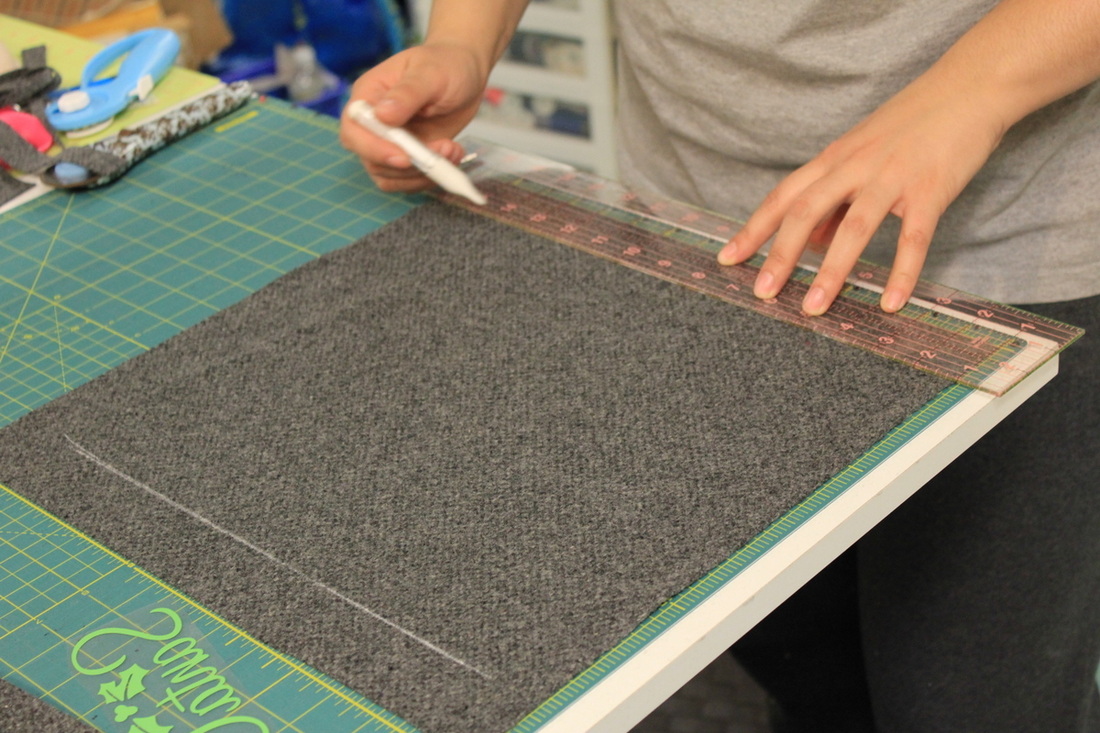
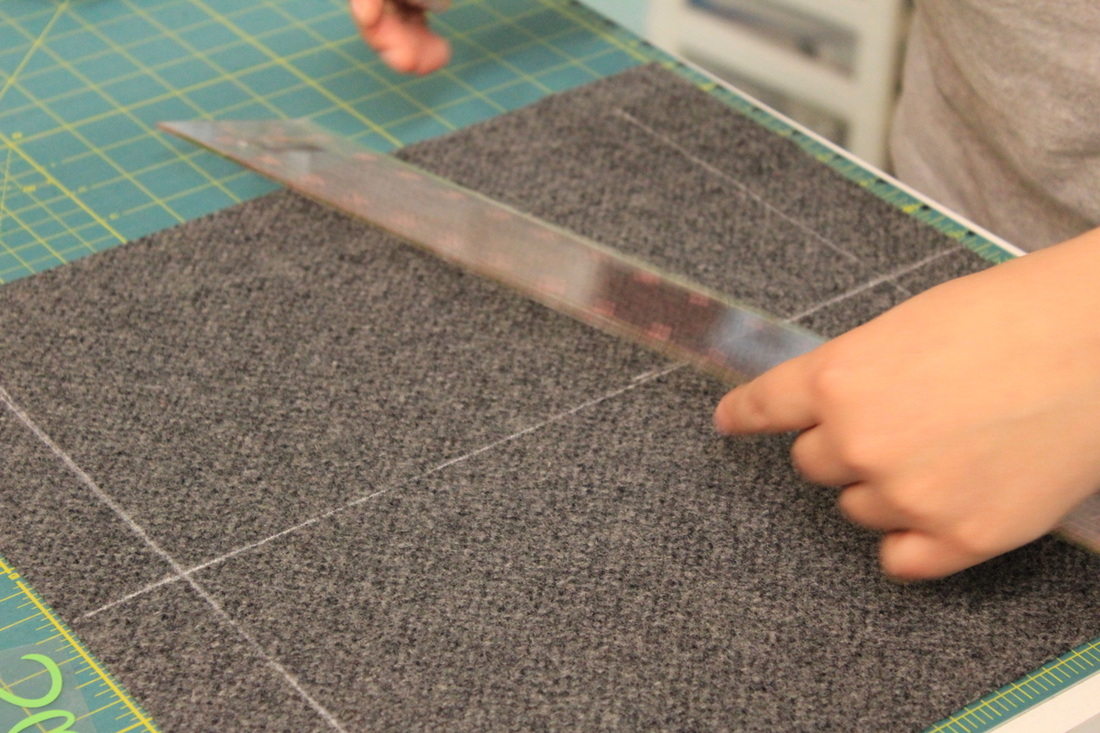
(I ended up putting another horizontal line across the middle, too.)
Then we were ready to start placing our colors! Since we cut the same image out of 3 colors, we ended up getting 3 pillows! (But of course we only took pictures of 1.) (Though you'll notice the pillow we're working on is a different one from the finished product! So you can see our awesomeness in colorways a little bit.)
Then we were ready to start placing our colors! Since we cut the same image out of 3 colors, we ended up getting 3 pillows! (But of course we only took pictures of 1.) (Though you'll notice the pillow we're working on is a different one from the finished product! So you can see our awesomeness in colorways a little bit.)
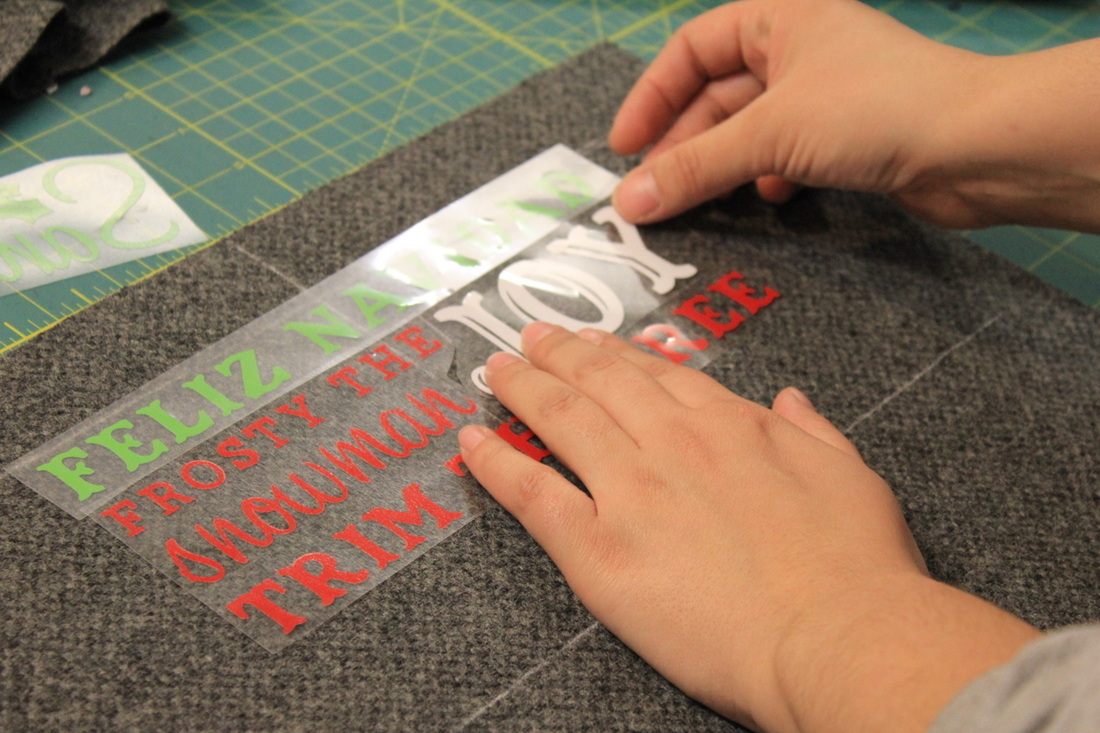

Once we were happy with the layout, we were ready to iron!
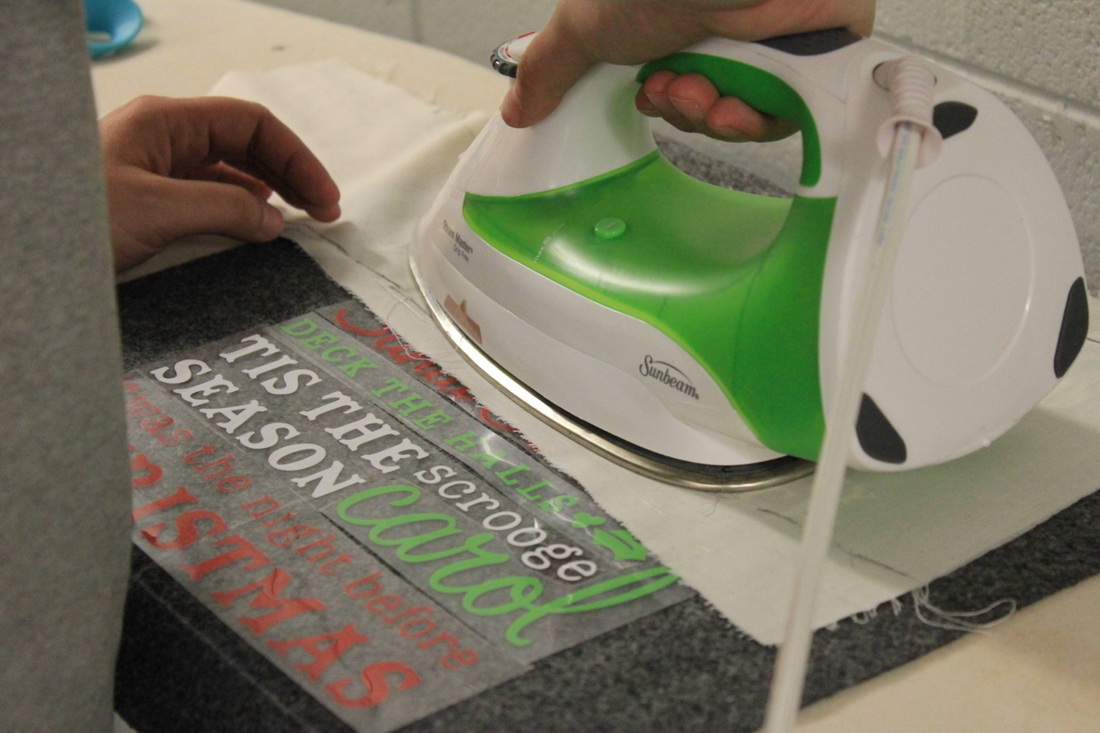
I used a press cloth (which for me was a scrap of muslin from another project), with the iron on the wool (medium high) setting. (Not because I was using wool, but because that was around the temperature that the vinyl suggested we use.)
I used a press cloth (which for me was a scrap of muslin from another project), with the iron on the wool (medium high) setting. (Not because I was using wool, but because that was around the temperature that the vinyl suggested we use.)
(Notice that we're on a different pillow here: the JOY is in red now, where it was white up above. Cool, right?)
I had to be careful when peeling off the clear vinyl backing (though it was on top at this point) because of the wool. On t-shirts, I've had no no no problem, but with the wool, I noticed that I had to iron it for a little longer, I had to be gentle when pulling off the backing, and then I ended up pressing over the vinyl again (with the press cloth) just to make sure it really stuck.
But it ended up looking amazing!
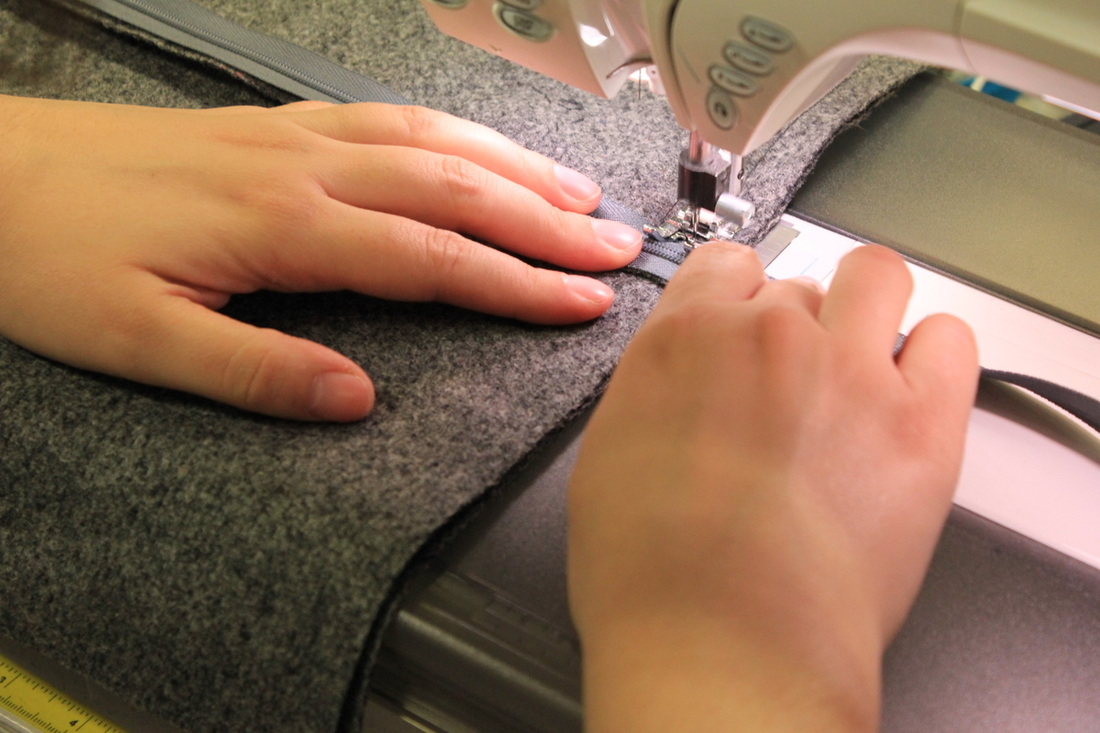
To get the pillow form in and out, I sewed an invisible zipper right down the middle of the back, which is a super easy way to do it. I cut the back pieces at 8" x 15" and I needed 2 back pieces for each pillow.
Then I sewed the front to the back!
Then I sewed the front to the back!
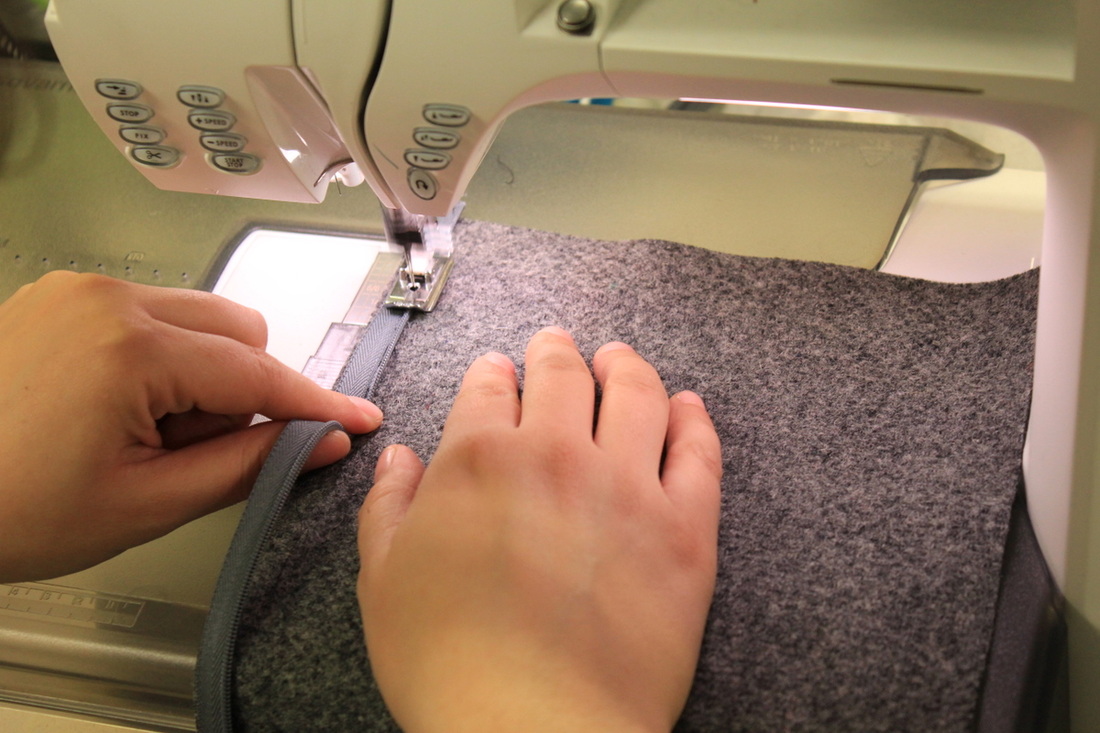
(I hope to post about inserting invisible zippers sometime. The trick is to have the right foot -- one made for invisible zippers. It makes the process a breeze.)
Flip the pillow case right side out, stuff with 14" pillow form...
And Voila!! Our amazingly cute Christmas-themed subway art pillow, made with Cricut's Word Collage cartridge. I'm only sorry we didn't take pictures of the 3 pillows together.
Flip the pillow case right side out, stuff with 14" pillow form...
And Voila!! Our amazingly cute Christmas-themed subway art pillow, made with Cricut's Word Collage cartridge. I'm only sorry we didn't take pictures of the 3 pillows together.
 RSS Feed
